
Flying Dron Flone - How to make a simple drone - step-by-step PDF manual
Flone (short for Flying Phone), this is a drone with a stuffing from a smartphone.

For the project, we need:
1. Android smartphone
2. Controllers from Multiwii or Arduino
3. The DSM2 controller
4. 4 motors
Step 1: Materials

1. Battery HK 3S 1500 mAh
2. Controller MicroWii
3. 4 speed controllers
4. A pair of black propellers 6x4
5. A pair of orange propellers
6. Anti-vibration sponge
7. Anti-vibration glue
8. Connector Male XT60
9. Screws M3
10. Elastic tape
Step 2: Cut out the case


Laser cutters can sing ballads, press the button, and the desired shape is ready. Of course, no one at home keeps such, but if you ask friends, it's likely that your friend's friend's brother-in-law has access to such a device. To speed up the search, try asking around in local clubs and radio enthusiasts stores.
Well, if the laser cutter is not an option for you at all, then you can just print out the layout on an A3 size sheet and cut the necessary shapes from the plywood. The DXF files themselves are located here.
Step 3: Build


We glue the leg amplifiers to the legs themselves (the diagram in photo number 4). We glue our feet. Once the glue has dried, we attach the motors.
Step 4: Attach the flight controller
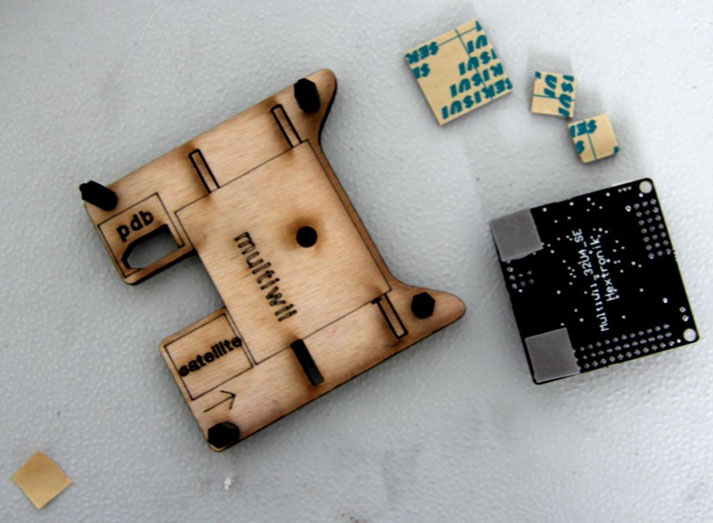
Which flight controller you bought is not important, they all are attached to one place - in the center of our brace. At this stage, you need to use an anti-vibration sponge, it must be attached between the panel and the controller to muffle the vibration of the panels.
Step 5: Solder the power distributor


The power distributor can be made from any copper plate, having made holes in it, and manually soldering the wires. We weld the connector for the battery and cables of the speed controller.
Step 6: Attach the DSM2 module

Module DSM2, this radio, in the photo - the black block on the lower left. This is the main communication channel for the drone with signals from the external, terrestrial world. At this stage we need a radio with a frequency of 2.4 GHz and four channels to control the drones, in the future we will use a smartphone for this. That is, the drone, inside which the smartphone will be, will be controlled by another smartphone.
Step 7: Flight controller configuration

The MultiWii / Arduino flight controllers are configured via a USB cable connected to a PC (software for MultiWii configuration). First, make sure the signal is present between the PC and the controller. We will need to adjust the magnetometer, accelerometer and gyroscopes.
Step 8: Connect the motors


We connect each motor to its speed controller, but before we finally solder all, we need to determine which controller wire with which motor wire to connect so that the motor spins in the direction we need. To do this, connect the 3 motor cables to the speed controller in random order, then the speed controller to the flight controller via the 3-pin connector, connect the battery to the flight controller. Turn on the radio, start the engine and check whether it is rotating in the correct direction. Repeat this with the remaining three motors, and when the test is completed, the cables can be soldered.
Step 9: Anti-vibration protection

We glue the sponge and rubber gaskets, which will protect our smartphone from vibration. Sponges are attached to the main frame, as shown in the photo. Then we wrap rubber pads over the sponges, and glue them on the frame from the back side.
Step 10: Attach the electronic board


Well, the drone is almost ready for flying! We attach the electronic board (the one on which the flight controller is located) to the main frame using screws.
Step 11: Mount the propellers


Step 13: Take off!

Write a comment